Add Row
Add Element
cropper
update
update
Add Element
  • Home
  • Categories
    • Healthy Hatchlings
    • Wellness Weekly
    • Avian Lifesavers
    • Vet Talks
    • Behind the Feathers
    • Rescue Roundup
    • Aviary Secrets
March 07.2025
2 Minutes Read

Easy DIY Chick Brooder Plans: Build Your Chicks a Safe Home Today!

DIY chick brooder plans outdoor setup with wooden structure.

Easy DIY Chick Brooder: Building the Perfect Home for Your Chicks

Constructing a DIY chick brooder can initially seem overwhelming, but with clear instructions and the right materials, you can create a warm and secure environment for your new feathered friends. Chicks, like any young animals, are vulnerable; thus, mimicking the protective functions of a mother hen is essential during their early weeks of life. This article synthesizes expert advice to help you assemble an effective brooder that ensures your chicks thrive.

Why a Chick Brooder is Essential for Young Birds

The brooder serves multiple purposes: it keeps the chicks secure from predators, provides adequate warmth, and allows sufficient space for them to thrive. As the article from Hobby Farms notes, maintaining the right environment within the brooder is crucial for the chicks' health and development; they require protection not just from the external elements but also from other animals that may pose a threat.

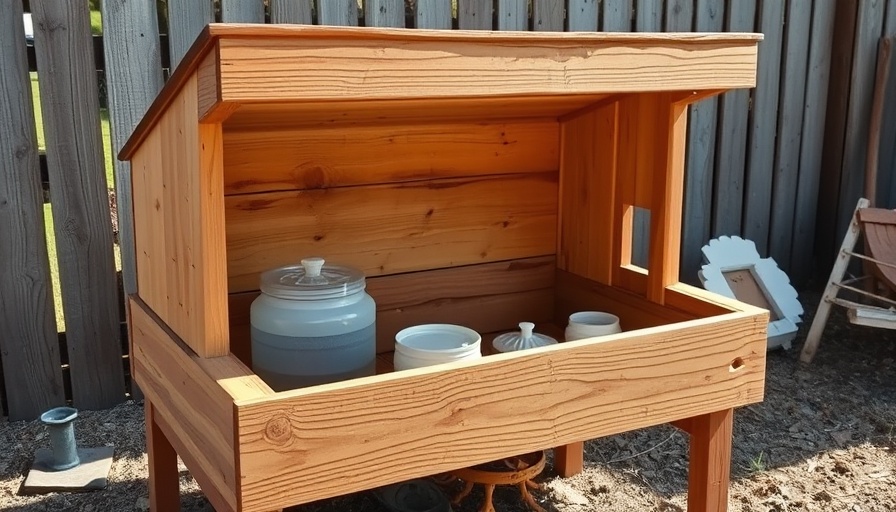
Essential Materials to Gather for Your Chick Brooder

Creating a chick brooder doesn’t require exotic materials. Here’s what you’ll need, as outlined in our research:

  • One 4-by-8-foot sheet of oriented strand board (OSB) or plywood
  • Several 2-by-2s to form the structure
  • Poultry netting or wire mesh for ventilation and security
  • Various screws and wood glue for assembly

Additionally, tools such as a drill, circular saw, and wire cutters are essential for construction.

Creating a Safe and Functional Brooder Setup

According to the Easy DIY Chick Brooder guide, eliminating awkward corners and ensuring easy access for cleaning are critical factors for maintaining brooder hygiene. The size of your brooder is equally important; chicks should have enough space to move while still having a heated area that mimics a mother hen’s warmth. Generally, for the first few weeks, at least 1 square foot per chick is recommended.

Heat Sources: Keeping Your Chicks Warm

Proper heating is vital for chick survival. You can use a heat lamp, which emits a warm light and should be securely mounted to prevent fire hazards. However, many experts, including those from the Longbourn Farm, recommend transitioning to a heat plate after the first week; it replicates a mother hen's body temperature better without the risk of fire.

Frequently Overlooked Accessories and Considerations

Have you thought about feed and water accessibility? Using automatic waterers minimizes contamination from bedding, significantly easing cleaning duties. Additionally, adding perches can encourage natural behavior and make your chicks feel safer. Providing them with an enriching environment can lead to healthier and more well-adjusted adult birds.

Taking Action: Start Building Your Brooder Today!

Now that you have a comprehensive understanding of constructing a chick brooder, the next step is execution. Consider your setup's location, materials, and the overall environment where your chicks will grow. Follow through with your plans, and you’ll be well on your way to raising healthy, happy chickens!

Vet Talks

3 Views

0 Comments

Write A Comment

*
*
Related Posts All Posts
07.28.2025

Manual Egg Turners: The Key To Successful Hatchling Development

Update Understanding Manual Egg Turners: A Key to Successful HatchingEgg incubation is a delicate process, and proper positioning of eggs is crucial for optimal development. Manual egg turners are a common tool among avian enthusiasts, offering a hands-on approach to egg management. This method allows breeders to manually turn the eggs at designated intervals, replicating the natural rotation that a mother hen would perform. Understanding how we utilize these turners not only enhances the hatching process but also ensures the health of the embryos within.The Science Behind Egg TurningTurning eggs during incubation is essential as it helps to prevent the embryo from sticking to the shell membrane. When using manual turners, it is recommended to turn eggs at least three to five times a day. This mimics the natural behavior of birds, enhancing heat distribution and ensuring that the developing chick remains centered within the egg.The Benefits of Manual Turners for Chick HatchingManual turners can help aviculturists maintain direct control over their incubation practices. By allowing for interactive management, these turners can be a more engaging and informative approach compared to automatic models. Additionally, breeders can observe the eggs closely, checking for any signs of infertility or developmental issues.Challenges and ConsiderationsWhile manual turning offers clear advantages, it is not without its challenges. Consistency is key; forgetting to turn the eggs can lead to poor hatch rates. Breeders must also consider their commitment—manual turning demands attention and can be demanding for those balancing other responsibilities.Conclusion: Making Informed Decisions for Healthier HatchlingsIncorporating manual egg turners into your incubation process can lead to more successful hatches. By understanding their operation and potential challenges, breeders can make informed decisions that align with their goals. Experimenting with various turning schedules may also yield optimal results, showcasing the uniqueness of each breeding operation. Therefore, reflecting on the mechanics of manual turners can significantly impact your future hatching successes.

07.28.2025

Navigating the Challenges of Integrating a Single Duck into Your Flock

Update The Nuances of Integrating a Single Duck Integrating a solitary duck into an existing flock can bring about challenges that require careful consideration and strategy. The process is akin to introducing any individual animal into a social group; it necessitates understanding their complex social behaviors. Ducks, being social creatures, usually thrive in groups, but introducing one to a pre-established flock can provoke territorial disputes and stress. Preparing the Flock for Integration Before introducing the new duck, certain steps should be followed to ensure a smoother transition. Gradual introductions can mitigate stress for all parties involved. Start by allowing the duck to observe the flock from a safe distance, such as through a fence or a divided area. This way, they can acclimate without direct confrontation. Monitoring Behavior Post-Introduction Once the integration begins, closely monitor how both the new and existing ducks interact. Signs of aggression, such as biting or excessive chasing, may indicate that immediate separation is necessary. It’s crucial to have a separate area where the new duck can retreat if feeling overwhelmed. Behavioral observations can provide insight into how integration is progressing, helping you identify potential issues early. Conclusions and Best Practices Integrating a single duck requires patience and understanding of avian social dynamics. Providing adequate space, monitoring interactions, and being prepared to separate the duck if needed can create a harmonious flock environment. Successful integration improves not only the well-being of the individual duck but also enhances the overall social structure within the flock.

07.27.2025

How to Calculate the Right Amount of Construction Sand For a 13×16 Coop

Update Calculating the Right Amount of Construction Sand for Your Chicken Coop Building a chicken coop not only requires proper design but also careful consideration of the materials used, particularly flooring. For those constructing a 13×16 coop, one common flooring choice is construction sand, appreciated for its drainage capabilities and ease of cleaning. Knowing how much sand to purchase can save you time and money. Estimating Your Sand Needs The first step in calculating the amount of sand needed is to determine the volume of the coop's flooring area. Since your coop measures 13 feet by 16 feet, the total area equals 208 square feet. The depth of the sand layer is typically about 2-4 inches. For this calculation, we will use 3 inches, which is a standard depth for effective drainage, allowing for waste management and comfort for the chickens. Volume Calculation To find the volume of sand required, the formula you will use is Volume = Area × Depth. In this case, convert the depth from inches to feet (3 inches = 0.25 feet). Thus, the volume of sand needed is: Volume = 208 sq. ft. × 0.25 ft. = 52 cubic feet It's important to note that construction sand is usually sold by the cubic yard. There are 27 cubic feet in one cubic yard, so to convert cubic feet to cubic yards, divide by 27: 52 cubic feet ÷ 27 = 1.93 cubic yards Therefore, you would need approximately 2 cubic yards of construction sand for your coop, accounting for settling and potential compaction over time. Considerations for Choosing Sand Selecting the right type of sand is equally crucial. Construction sand should be free of contaminants and have a size that provides good drainage. Avoid any sand that could cause respiratory issues for chickens. Consulting local suppliers about the best options may provide additional insights. Final Thoughts Properly calculating and selecting the right amount of construction sand can significantly enhance the health and comfort of your chickens. As you create your coop, remember to ensure adequate ventilation and consider how the flooring can contribute to a clean environment.

Terms of Service

Privacy Policy

Core Modal Title

Sorry, no results found

You Might Find These Articles Interesting

T
Please Check Your Email
We Will Be Following Up Shortly
*
*
*